| Filament Family | Best Fit for Lithophanes | Light Behavior | Detail Behavior | Thermal Headroom Near Lights |
|---|---|---|---|---|
| Natural / Off-White PLA | Highest “photo-like” grayscale with minimal fuss | Balanced transmission + diffusion; forgiving tonal gradients | Sharp edges, low warp; prints clean at fine layers | Tg typically in the mid-50°C range; keep away from hot bulbs [f] |
| Bright White (High-Opacity) PLA | Bold contrast when the light is strong | More blocking; can compress mid-tones if the filament is very opaque | Crisp detail; may show layer bands if the surface gets glossy | Similar to PLA family; watch heat close to the lamp |
| Matte PLA (Mineral-Filled Look) | Smoother “printless” look in many designs | Higher diffusion; can soften micro-contrast in tiny features | Hides layer sheen; can slightly round ultra-fine edges | Similar to PLA family; safe with cool LED setups |
| Translucent / Clear PETG | When you need more temperature tolerance | Can be very clear; internal voids show more if settings aren’t dialed | Good detail, but stringing can blur thin “bright” regions | Tg around ~80°C class; better margin near warm environments [g] |
| Silk / Pearl Effect PLA | Decorative glow, not strict photo fidelity | Shimmer adds visual texture that can mask subtle shading | Surface shine can emphasize banding under strong backlight | Similar to PLA family; treat as decorative |
| Filled PLA (Wood/Metal/CF “Look”) | Usually for themed pieces, not photo realism | Particles scatter light unpredictably; grayscale can get “muddy” | Abrasive risk, more nozzle wear; details may soften | Varies; focus on aesthetics rather than image accuracy |
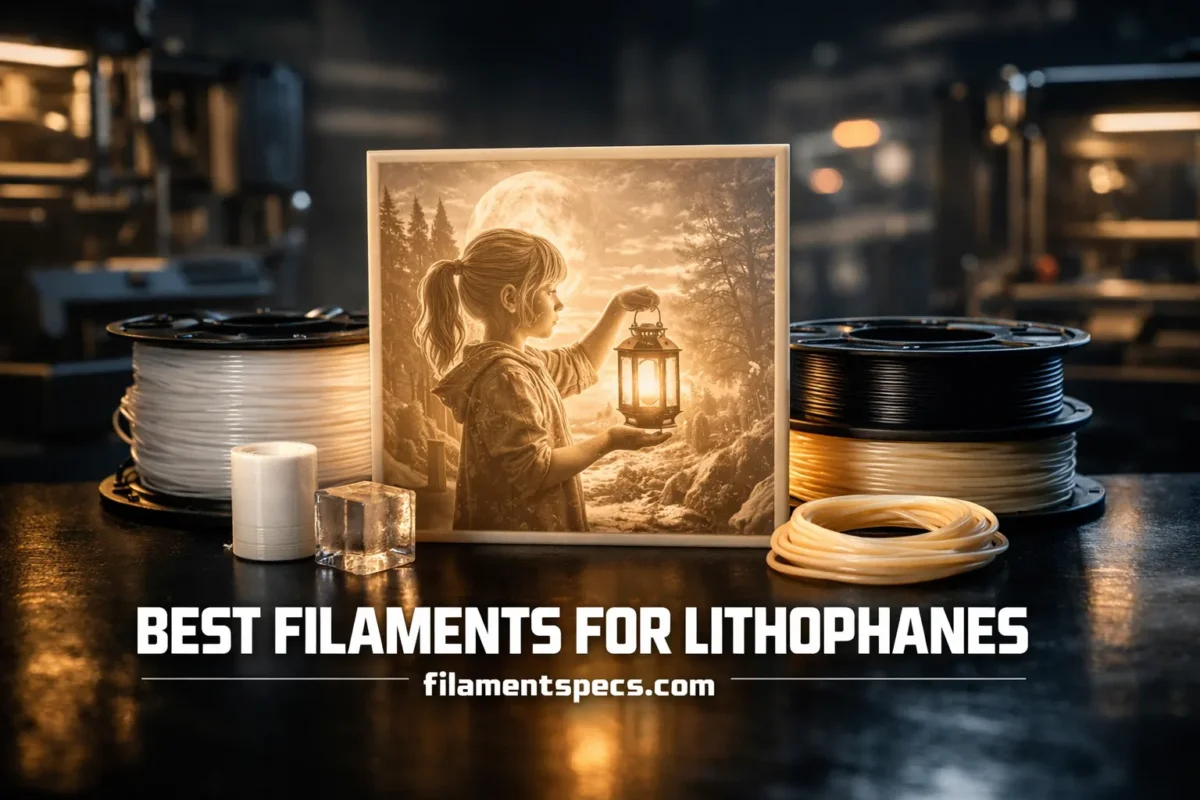
Lithophanes are all about controlled light loss: every pixel becomes a thickness decision, and the filament decides whether that thickness turns into clean grayscale or a washed-out blur. The “best” filament isn’t a brand name—it’s a material behavior profile: predictable transmission, stable diffusion, and consistent extrusion. Get those three right and even a simple photo can look surprisingly deep when backlit.
Lithophane quality is mostly optical. Mechanical strength matters, but the winning difference is how evenly your filament turns thickness into brightness without streaks, bubbles, or gloss bands.
Table of Contents
🔦 What Matters Most
A lithophane is basically a tiny light-attenuation model. In plain terms, brightness drops as the light path through plastic gets longer, and the look changes depending on how much of that loss is absorption versus scattering. If you only think “more thickness = darker,” you’ll miss why two white PLAs can look totally different at the same millimeter value. One might scatter light broadly and hide layer artifacts; another might pass light cleanly but reveal every internal void. A materials study on printed filament appearance separates these effects into extinction and scattering behavior, which is exactly the mental model you want for lithophanes [b].
Three Optical Controls That Decide “Photo” vs “Plastic”
- Transmittance: how much light gets through at a given thickness (sets your maximum brightness).
- Haze / diffusion: how broadly the light spreads after passing through (sets smoothness and hides layer boundaries).
- Uniformity: how consistent the above two are across the entire print (prevents streaks, blotches, and banding).
Relative Behavior (Typical, Not a Spec)
🧩 PLA Choices
PLA earns its reputation in lithophanes because it prints cleanly at fine layers and holds edges without needing an enclosure. The detail advantage is real, but the lithophane advantage is more specific: many PLA blends land in a sweet spot where they transmit enough light for bright whites while still scattering enough to smooth gradients. Experimental testing on printed PLA specimens shows that layer height and wall thickness directly change light transmittance and haze, which is the same knob you’re turning when you choose a lithophane profile [a].
- Natural / Off-White PLA
- Usually the most forgiving grayscale. It tends to diffuse light gently, so minor internal artifacts don’t scream through the backlight. If you want consistent results across many photos, start here.
- Bright “Paper White” PLA
- Often higher pigment loading. It can create punchy darks, but it may reduce the usable mid-tone range if your light source is not strong enough. Great for bold portraits and logos; less forgiving for subtle gradients.
- Matte PLA
- Often includes fillers or additives that boost diffusion. That can make the surface look smoother and reduce shiny banding. The trade-off is that tiny tonal differences can soften, especially in very fine skin textures or hair strands.
- Silk / Pearl PLA
- Pretty for lamps and décor. The shimmer adds its own “texture,” which can fight the idea of a pure grayscale photo. Use it when you want style more than strict fidelity.
Material reality check: a PLA resin datasheet lists a glass transition temperature in the 55–60°C range, plus a typical printing temperature window (as a starting point) [f]. For lithophanes, that means cool LEDs are the comfy match; very warm lamps can soften thin bright zones over time.
🌡️ PETG Choices
PETG steps in when temperature margin matters or when you want a naturally clearer look. A copolyester technical publication lists a glass transition temperature around 80°C and provides typical deflection temperature data, which explains why PETG tends to feel “safer” around warmer setups compared to standard PLA [g]. For lithophanes, the key is that clear materials can either look stunning or brutally reveal every internal inconsistency.
- Translucent PETG can produce bright highlights with a “glassier” feel, especially for geometric designs and cleaner photos.
- Clear PETG can flatten contrast if your thickness range is narrow; it often rewards a wider thickness span and careful calibration.
- Stringing control matters more: wisps and micro-strings in bright areas behave like tiny light blockers when backlit.
When PETG Is a Smart “Best Filament” Call
- The lithophane sits near a warm environment and you want extra thermal margin.
- You prefer a cleaner, clearer light path and you’re willing to tune retraction and cooling.
- Your printer is already dialed for PETG and produces low-void walls.
✨ Specialty Filaments
Specialty filaments can be amazing, but lithophanes are picky. Additives that look great in normal prints (sparkle, heavy pigments, fibers) can change the way light scatters and the way micro-thickness differences show up. If you want a more technical way to think about it, haze and luminous transmittance are standard optical metrics for transparent plastics—measuring not only how much light passes through, but how much gets diffused [c]. Lithophanes love controlled diffusion; they hate random diffusion.
Good fit: gentle diffusion (off-white, some matte blends) that stays consistent across the spool.
Risky fit: glitter, glow, heavy “effect” pigments, or fiber-filled blends—those can introduce speckle-like scattering that shows up as texture in the lit image.
📏 Calibrate Thickness
Most “best filament” lists skip the part that actually makes your results repeatable: matching your filament to your light source. Light attenuation is commonly modeled as an exponential drop with path length (the core idea behind Beer’s law), which is a neat way to explain why tiny thickness changes can have big visual impact at the bright end [h]. You don’t need a lab. You just need a small calibration print.
- Create a simple “step wedge” model: one tile with 6–10 thickness steps (each step a flat rectangle). Keep steps smooth, no patterns.
- Print it using the same nozzle, layer height, and filament you’ll use for the real lithophane.
- Backlight it with the exact light setup you’ll display with (same LED strip, same diffuser, same distance).
- Pick two anchors by eye: the thinnest step that still looks clean (not blown-out) and the thickest step that still shows detail (not a flat black).
- Use those anchors as your “white” and “black” thickness limits in your lithophane generator/slicer workflow.
What This Calibration Solves
- Stops washed-out faces by preventing too-thin “white” zones for your specific LED brightness.
- Reduces muddy mid-tones by ensuring the middle steps land in a useful brightness range.
- Makes filament swapping predictable: new spool, new wedge, same display, easy adjustment.
🧾 Spec Sheet Signals
When you’re hunting “best filament,” the most useful clues often aren’t marketing terms—they’re process and consistency signals. Melt flow rate (MFR) is a standardized way to report how a thermoplastic flows under defined temperature and load conditions, which is why material standards describe it as a controlled measurement rather than a casual label [d]. For lithophanes, you’re not chasing maximum strength; you’re chasing stable, repeatable extrusion at very fine detail.
- Diameter consistency
- Look for a filament that feeds smoothly with minimal ovality. Lithophanes punish tiny flow changes because thin bright zones are the first to show under-extrusion.
- Flow stability (how “steady” it extrudes)
- Even without numbers, you can often infer stability from a brand that publishes real processing guidance and has consistent spool winding. Stable flow means fewer density streaks in backlight.
- Opacity language
- “Natural,” “milky,” “translucent,” and “ultra white” imply very different pigment loads. More pigment often means stronger contrast but less mid-tone range.
- Surface character
- Matte tends to hide banding; glossy can highlight it. Pick based on whether your photos rely on subtle gradients.
If you’re comparing two “white PLAs,” ask one question: does the filament act like a controlled diffuser or like a random light filter? That single difference is why one spool makes buttery gradients and another makes zebra banding.
💧 Drying & Storage
For lithophanes, moisture isn’t just a mechanical issue—it’s an optical one. Moisture in filament can increase porosity and change microstructure during printing, which shows up as tiny scattering points once the piece is backlit. A study on humidity exposure in printed PLA discusses how moisture relates to material degradation and porosity/microstructure changes, which is the exact pathway that can turn smooth gradients into speckled highlights [i].
- Symptoms that matter for lithophanes: “frosty” bright zones, random sparkle-like specks, uneven transmission across large flat areas.
- What to do: store sealed, dry when needed, and keep the spool protected during long prints.
- Why it works: fewer micro-voids and fewer steam-related artifacts means cleaner, more predictable light passage.
❓ FAQ
Is PLA always the best filament for lithophanes?
PLA is the most consistent starting point because it usually prints clean detail with minimal warp and gives a balanced diffusion profile. It’s “best” when your display uses cool LEDs and you want reliable grayscale without heavy tuning.
Should I pick bright white or off-white?
Off-white/natural often gives smoother gradients because it diffuses light gently. Bright, highly pigmented whites can boost contrast but may reduce mid-tones unless your backlight is strong and even.
Do clear filaments make better lithophanes?
Clear can look very bright, but it can also reveal internal voids and tiny flow variations more easily. If you like the clearer look, a translucent blend plus a thickness calibration wedge usually produces more predictable results than “crystal clear” alone.
Why do some lithophanes look striped when lit?
Most stripes come from small density or flow changes becoming obvious under backlight. Filament uniformity, stable extrusion, consistent cooling, and a surface finish that doesn’t over-highlight layer sheen all help reduce it.
Is PETG a good choice for lithophanes near warm lighting?
PETG often provides more temperature margin than standard PLA. The trade-off is that it can demand tighter tuning to avoid stringing and internal inconsistencies that show more in clear/translucent materials.
Does drying filament really change the final image?
Yes. Moisture-related micro-voids and surface artifacts behave like tiny light scatterers. Because lithophanes are judged under transmitted light, those “invisible” defects become visible texture.
📚 Sources
- [a] BioResources (NCSU platform): Optical transmittance & haze testing of printed PLA vs thickness/layer parameters (peer-reviewed academic journal site; used for the section on how print parameters change transmittance and haze).
- [b] Technical University report: Optical properties and appearance of FDM filaments (university-hosted research PDF; used for the absorption vs scattering model relevant to lithophane appearance).
- [c] ASTM D1003 standard page: Haze and luminous transmittance of transparent plastics (standards body reference; used for the definitions of haze/transmittance as practical optical metrics).
- [d] ISO 1133-1: Plastics—Determination of melt mass-flow rate (MFR) and melt volume-flow rate (international standard reference; used to ground MFR as a controlled measurement for flow behavior).
- [e] ISO 527-1: Plastics—Determination of tensile properties (international standard reference; supports the idea of standardized mechanical reporting when comparing datasheets).
- [f] NatureWorks technical datasheet: Ingeo biopolymer 4043D (monofilament/3D) (manufacturer primary documentation; used for PLA thermal/processing figures such as Tg and typical printing window as starting points).
- [g] Eastman technical information: Eastar copolyester 6763 (manufacturer primary documentation; used for PETG-class Tg and thermal headroom discussion).
- [h] Davidson College: Beer’s Law overview (college chemistry education resource; used for the thickness-to-transmission concept behind calibration wedges).
- [i] University-hosted journal PDF: Humidity impact on porosity/microstructure in printed PLA (academic paper PDF; used for moisture-to-porosity pathway that affects backlit appearance).