| Method | Works Best When | Filaments It Usually Fits Well | Gap Handling | Finish | Can Be Opened Later | What It Usually Does Best |
|---|---|---|---|---|---|---|
| CA Glue | Tight seams, small to medium rigid parts, quick assembly | PLA, PETG, ABS, ASA | Low | Clean, thin bond line | Rarely | Fast joining of close-fitting rigid parts |
| 2-Part Epoxy | Uneven seams, mixed materials, slower alignment | PLA, PETG, ABS, ASA, nylon, filled filaments | High | Can be sanded and feathered | No | Gap filling and load spread across imperfect seams |
| Solvent Welding | Matched polymers that actually respond to the solvent | ABS, ASA, some PVB workflows | Low | Most seamless when done well | No | Fusing matched plastics instead of adding a thick glue layer |
| Heat-Set Inserts + Screws | Panels, covers, housings, repeat assembly | PLA, PETG, ABS, ASA, nylon | Not a glue method | Visible only if hardware is exposed | Yes | Serviceable joints that can be tightened, removed, and reused |
| Pins or Dowels + Adhesive | Large parts that need registration before bonding | Most rigid filaments | Medium | Usually hidden | Sometimes | Alignment and shear support across long seams |
| Magnets | Lids, covers, removable accessories | Most filaments | Not a glue method by itself | Hidden when pocketed well | Yes | Clean removable joints with repeatable positioning |
| Plastic Welding With Heat | Large utility parts where appearance matters less than bond area | ABS, ASA, PLA, some PETG jobs | Medium | Often needs cleanup | No | Adding material into the seam from the same polymer family |
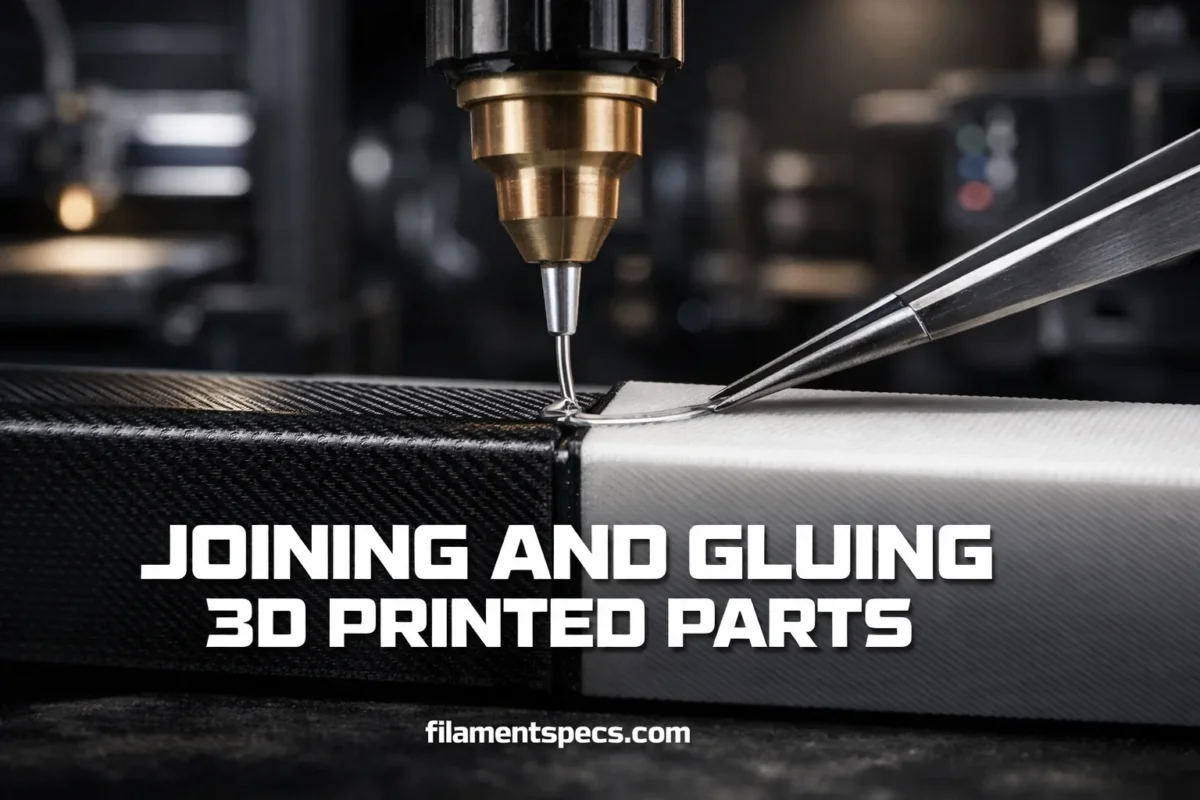
A seam can fail even when the glue itself is fine. Joint geometry, the way the load enters the part, surface condition, bond-line thickness, and the plastic’s own chemistry decide whether the break happens inside the adhesive, at the interface, or in the print itself. A plain butt seam is easy to model. It is rarely the smartest answer for a loaded part. [f]
Table of Contents
For rigid FDM parts, cyanoacrylate is usually the first bottle worth testing when the seam is already tight. Epoxy becomes easier to work with when the fit is imperfect, the parts are larger, or you want more time to align the assembly before it locks in place. [b]
🧩 Best Joining Methods for Different Jobs
CA Glue
- Best for tight, rigid seams and parts that already register well.
- Very little squeeze-out is needed when the fit is good.
- Not the right pick for a wavy seam that needs filler.
- Works well for display pieces, housings, brackets, and split parts with alignment pins.
2-Part Epoxy
- Better when the seam is uneven, large, or slightly open.
- Gap filling is its main advantage on printed parts.
- More forgiving on mixed-material jobs.
- Often easier to sand smooth after cure than a brittle thin glue line.
Solvent Welding
- Only works well when the polymer and solvent actually match.
- Excellent for ABS and ASA seams that need a cleaner, more fused look.
- Usually not the shortcut people hope for on PLA or PETG.
- Bond line can disappear nicely, but chemistry decides everything.
Heat-Set Inserts and Screws
- Use this when the part should open again later.
- Ideal for covers, access doors, tool bodies, electronics housings, and fixtures.
- Serviceability is the whole point.
- Usually a smarter move than glue if you expect maintenance.
Pins, Dowels, and Magnets
- Great for registration on long seams and multi-part shells.
- Dowels help the joint resist shear before the glue takes the full load.
- Magnets shine on lids and removable faces.
- Best results come when the pockets, lead-ins, and stops are designed in from the start.
Plastic Welding With Heat
- Useful for utility parts, jigs, brackets, and large shells.
- Works best when you can add matching material into the seam.
- Appearance often needs sanding later.
- Strong enough for many workshop parts. Less elegant for finished cosmetic seams.
🧵 Match the Method to the Filament
Material behavior changes the whole plan. PLA is easy to print and easy to fit, but it does not like heat. PETG is tougher and more chemically resistant. ABS and ASA open the door to solvent-based finishing. Nylon brings strength, but moisture control matters before you even think about the seam. [h]
There is also a separate bucket: low-surface-energy plastics such as PP. General-purpose glue choices get less predictable there, so joint design and adhesive family matter even more than usual. [a]
| Filament | Usually the First Method to Try | What Often Works Well | Use Extra Care With | Practical Note |
|---|---|---|---|---|
| PLA | CA on a close fit | Epoxy, pins plus adhesive, inserts for housings | Hot environments and plain butt seams on loaded parts | Easy to assemble cleanly, but low heat resistance limits where the finished part can live. |
| PETG | Epoxy or CA on a tight seam | Screws, inserts, pins, lap joints | Assuming solvent welding will behave like ABS | Usually more forgiving in service than PLA, especially on parts that see impact. |
| ABS / ASA | CA for fast assembly or solvent welding for matched parts | Epoxy, inserts, plastic welding | Rushing solvent work on visible cosmetic surfaces | Very flexible joining menu. ASA is often the better outdoor choice. |
| Nylon | Fasteners or tough epoxy after good prep | Inserts, screws, overlap joints | Joining parts that were printed from wet material | Dry filament and dry parts usually give cleaner, more repeatable results. |
| TPU / TPE | Mechanical retention first | Bolted joints, captures, pockets, stitched-in accessories where the design allows | Rigid brittle seams in flexing areas | For flexible parts, the joint should usually stay flexible too. |
| PP | Mechanical design first | Pins, screws, purpose-made plastic-bonding systems | Assuming any general-purpose glue will grab well | Designing the joint is often more effective than changing bottles. |
| CF / GF Filled Filaments | Inserts, screws, lap joints, tough epoxy | Pins, dowels, hidden hardware | Thin snap details and sharp stress risers | These materials are stiff and useful, but seams still dislike stress concentration. |
📐 Design the Joint Before You Print
The strongest improvement often happens in CAD, not at the workbench. If a part will carry load, stop treating the seam as a line. Treat it as an area.
Joint Shapes That Usually Beat a Plain Butt Seam
- Lap joints add bond area and usually load the adhesive more favorably.
- Step-lap joints help with alignment and reduce the visual step across the seam.
- Scarf-style joints spread the transition over a longer path and are easier to hide after finishing.
- Tongue-and-groove or keyed seams keep parts from sliding during clamp-up.
- Dowel-pin registration keeps long shells aligned while the adhesive cures.
Open-access work on interlocking and lap-style adhesive joints makes the tradeoff clear: overlap length, surface condition, bond-line thickness, and joint shape all influence how stress builds near the seam edges. That is why a small change in seam geometry can matter more than switching glue brands. [f]
Build a coupon first. Print two tiny test pieces with the same walls, infill, joint shape, and material as the real part. Break them on purpose. That tells you more than forum guesswork ever will.
Print Setup Around the Seam Still Matters
- Add more perimeters where screws, inserts, or pins will live.
- Keep joints away from very thin edges when possible.
- Use internal ribs or bosses so hardware loads a larger area.
- Place the seam so the part is not trying to peel itself open during use.
- Hide the seam on a neutral or compressive side when the design allows.
Printed parts are anisotropic. Layer direction, shell thickness, infill density, and part orientation affect strength, so a well-designed seam can still disappoint if the printed part around it is weak across the layer stack. [i]
🧼 Surface Prep and Clamping
A neat seam starts with boring work. Dry-fit the parts, trim elephants-foot flare if needed, remove dust, and clean the surface so oil and residue do not sit between the plastic and the adhesive. Also check the product instructions: some adhesives prefer a little tooth, while others behave better on a flatter, closer joint. [b]
On FDM PLA, surface treatment can move the result by a wide margin. One open-access study reported average pull-off strength above 8.5 MPa after isopropanol cleaning, versus about 5.6 MPa for untreated PLA. That does not mean IPA is always the winner on every adhesive system, but it does show how much prep work changes the seam. [c]
Clamp Pressure Should Hold, Not Starve the Seam
Too little pressure lets the seam drift. Too much pressure can squeeze out the very material that should stay in the joint. For printed parts, simple tape, rubber bands, soft jaws, painter’s tape hinges, or a printed alignment jig often work better than brute-force clamping.
🧪 When Solvent Welding Makes Sense
Solvent welding is not “stronger glue.” It is a chemistry-specific way to soften the surface so matched parts can fuse together. For desktop FDM work, ABS and ASA are the most familiar examples with acetone. PVB sits in a different lane and can be smoothed with isopropyl alcohol. PLA and PETG do not give you the same easy acetone shortcut people often assume. [d]
Use Solvent Welding for the Right Reasons
- Matched ABS or ASA parts that need a cleaner, more fused seam
- Parts that will be sanded and finished after assembly
- Assemblies where a thin bond line matters more than rework speed
Skip It When
- The polymer does not clearly match the solvent behavior you want
- The surface is already dimension-sensitive and cannot tolerate softening
- You actually need gap filling more than fusion
🔩 Heat-Set Inserts, Screws, and Serviceable Assemblies
If the part should be opened later, glue is often the wrong first move. Heat-set inserts let the plastic reflow around the knurled body so the screw threads live in metal, not in printed plastic alone. Prusa’s installation note is practical: start around the print temperature used for that filament, then go roughly 10 to 20°C higher on the iron for insertion. [e]
- Use inserts on access panels, battery doors, electronics housings, and fixtures.
- Give the insert a boss or thickened zone instead of dropping it into a thin wall.
- Keep some distance from free edges so the material around the insert has room to resist pull-out.
- Use washers or broader bearing surfaces when the screw clamps a softer printed wall.
For any joint that will see real load, test it in the actual printed material. NASA’s fastener standard makes the broader engineering point well: insert pull-out depends on the parent material, and for nonhomogeneous or nonmetallic materials, allowable pull-out should come from testing rather than assumption. [g]
⚠️ Mistakes That Break Joints Early
- Using a plain butt seam where an overlap joint would fit
- Trying to fix a poor fit with a thin glue that does not fill gaps
- Ignoring seam placement and loading direction
- Installing inserts in walls that are too thin or too close to an edge
- Joining parts before trimming first-layer flare and print artifacts
- Using a rigid seam in a zone that must flex repeatedly
- Rushing cure time, then judging the bond too early
- Assuming all plastics respond well to the same adhesive family
That last mistake is common. Some plastic-bonding systems are meant for difficult-to-bond surfaces, some are built for thin close-fitting seams, and some solvent-based products can attack or craze certain plastics. Polymer compatibility comes before brand loyalty. [a]
FAQ
Is super glue or epoxy better for 3D printed parts?
Neither wins every time. Super glue usually makes more sense on rigid parts with a very close fit and a thin seam. Epoxy is usually easier when the joint is larger, slightly uneven, or needs more working time and gap filling.
Can PLA parts be solvent welded like ABS?
Not in the same easy, familiar way that ABS or ASA can be worked with acetone. PLA needs a different joining plan, and in many real builds that means CA, epoxy, pins plus adhesive, or mechanical fastening instead.
What joint shape is better than a plain butt seam?
Lap, step-lap, scarf, keyed, or dowel-registered seams usually give the adhesive more area and help the assembly resist sliding and peel better than a plain edge-to-edge seam.
Do heat-set inserts work in PLA?
Yes. They work in PLA, PETG, ABS, ASA, and nylon when the surrounding geometry is sensible. The insert still needs enough material around it, and heavily loaded joints should be tested in the actual printed part.
Should I sand the seam before gluing?
Often yes, but not blindly. Remove print artifacts, get the fit right, and follow the adhesive’s own surface-prep instructions. Some systems like a slightly roughened surface, while others behave better on a flatter close fit.
What is the smartest way to join large 3D printed shells?
Design alignment into the parts first. Pins, keys, or tongue-and-groove features make long seams much easier to register. Then choose the bond method based on the material and the fit: thin glue for tight seams, epoxy for uneven seams, and hardware if the shell should open again later.
Sources
- [a] 3M Solutions for Plastics & LSE Substrates — used for adhesive-family selection, low-surface-energy plastic context, and the note that some solvent-based adhesives may attack certain surfaces (official 3M engineering PDF).
- [b] Loctite: How to Glue 3D Prints in a Few Easy Steps — used for rigid-part adhesive choice and surface-prep workflow such as cleaning, dry fitting, and texture checks (official manufacturer guidance).
- [c] Influence of Surface Treatments on the Pull-Off Performance of Adhesively Bonded PLA Specimens Manufactured by FDM — used for the PLA surface-prep data point and bond-strength comparison (peer-reviewed open-access paper hosted by NIH/PMC).
- [d] Original Prusa: Improve Your 3D Prints With Chemical Smoothing — used for ABS/ASA with acetone and PVB with isopropyl alcohol in solvent-finishing context (official 3D printing manufacturer knowledge article).
- [e] Original Prusa: Heat Set Inserts — used for insert installation behavior and the practical soldering-iron temperature note (official product documentation).
- [f] Modelling, Additive Layer Manufacturing and Testing of Interlocking Structures for Joined Components — used for failure modes, overlap-joint behavior, and why seam geometry changes stress distribution (peer-reviewed open-access paper hosted by NIH/PMC).
- [g] NASA-STD-5020A — used for the insert pull-out and parent-material testing caution on loaded joints (government engineering standard).
- [h] UltiMaker: 3D Printer Filament Types and Uses — used for practical material behavior notes on PLA, PETG, ABS, ASA, nylon, TPU, and filled filaments (official manufacturer reference article).
- [i] UltiMaker: PETG vs PLA vs ABS — 3D Printing Strength Comparison — used for print-orientation, shell-thickness, and anisotropy context around seam performance (official manufacturer technical article).